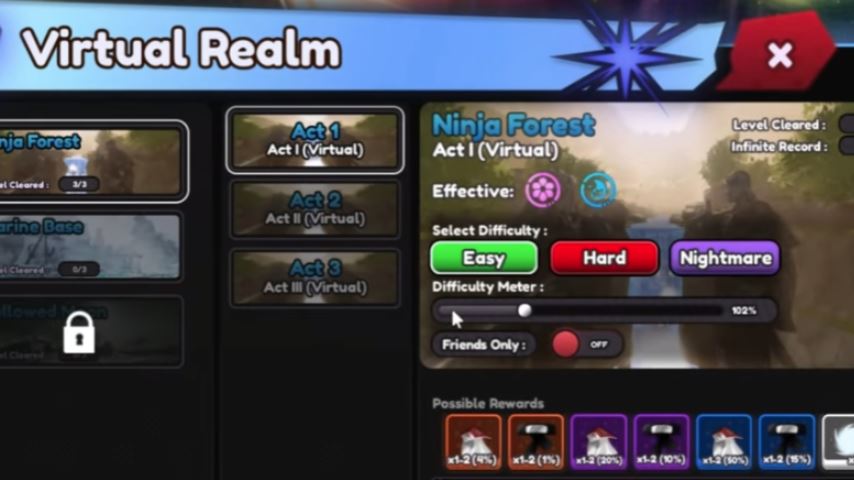
The Virtual Realm in Universal Tower Defense is a challenging endgame mode designed for coordinated teams. However, with the right strategy, it can be consistently farmed solo using a minimal setup. This guide will detail the most effective method, centered around Kirito, to conquer this realm and farm its valuable rewards consistently.
Why Kirito is the Solo Virtual Realm Meta
Kirito’s exclusive passive ability is the cornerstone of this solo strategy. It provides powerful scaling based on critical hits, which synergizes perfectly with the Virtual Realm’s mechanics. His follow-up attacks, which trigger on critical hits, become the primary source of damage, allowing him to handle the mode’s high-health enemies and fast-scaling bosses with the correct build.
Core Solo Setup and Unit Roles
This strategy requires only two essential units, making it highly accessible:
Kirito (The Main Damage Dealer): Your sole source of damage. All strategy revolves around maximizing his critical hit potential and follow-up attack scaling.
Meiku (The Idol Support): A non-negotiable support unit. Place her on Damage Buff mode. She provides crucial damage and range buffs to Kirito, which are vital for covering lanes and defeating late-wave bosses.
Optional Farm Unit: A single, low-cost unit can be placed early to generate extra gold. This unit is not required for damage and should not interfere with Kirito’s placement.
Optimal Kirito Build and Stat Priority
Your entire build must focus on amplifying Kirito’s critical damage output. The Virtual Realm provides a flat 30% critical rate bonus, which heavily influences your stat priority.
Primary Stats: Critical Damage and Critical Rate. While the realm gives a rate bonus, further boosting it to near 100% is key for consistent follow-up attacks.
Secondary Stats: Damage %, Range.
Etherealization Level 6: This upgrade significantly increases clear speed but is not mandatory for lower difficulty percentages. It becomes more important for efficient higher-percentage runs.
Virtual Realm Card Strategy: Picks and Bans
Card choices make or break your run. You must select cards manually; AFK is not an option.
Mandatory Pathway: Death
You must select the Death pathway when offered. It provides three key advantages:
Allows Kirito to ignore deadly AoE debuff zones.
Grants a substantial bonus to Critical Damage.
Transforms negative “Death” cards into benefits.
Essential Card Picks (Positive Effects):
AoE Size Reduction: Makes enemy clusters tighter, perfect for Kirito’s attacks.
Range Increase: Crucial for helping Kirito hit bosses that move out of his default range.
Damage Amplification / Buff Amplification: Directly increases your damage output.
Kill-Based Buffs (e.g., on 50 kills): Provides stacking bonuses throughout the wave.
Cards to AVOID (Negative Effects):
Flat Damage Decrease: Severely cripples your main damage source.
Attack Speed Decrease: Lowers the frequency of your attacks and critical procs.
Critical Chance Decrease: Directly counteracts your build’s core mechanic.
Placement, Upgrade, and Wave-by-Wave Strategy
Initial Placement: Place Kirito in the middle lane to maximize his coverage. Place Meiku Idol nearby, set to Damage Buff.
Upgrade Priority: Focus all gold on upgrading a single Kirito unit first until he unlocks his Area of Effect (AoE) attack. This is critical for early wave clear. After unlocking AoE, you can start upgrading your other Kirito placements more evenly.
Boss Wave Tactics: Bosses scale quickly.
Enhanced Armament: Activate Kirito’s Enhanced Armament ability manually when the boss appears for a burst of damage.
Repositioning: If a boss moves out of Kirito’s range, you can sell and immediately rebuy Kirito in a new, closer location. The gold refunded and accumulated during the run makes this feasible.
Range is Key: Use picked Range Increase cards and Meiku’s buff to ensure Kirito can always reach the boss.
Efficient Farming: Difficulty and Rewards
Optimal Difficulty: Farm at around 100% difficulty. Going significantly lower may reduce your card reward chances, while going much higher increases clear time and risk without benefiting card drop rates.
Nightmare Mode: Avoid it for card farming. Nightmare is better suited for farming specific headgear cosmetics, not for consistent card or Virtual Token acquisition.
Rewards: You can earn a maximum of 10 Virtual Tokens per run, regardless of difficulty percentage. This makes the 100% difficulty the most time-efficient for consistent token and card farming in a solo setting.
FAQ (Frequently Asked Questions)
Q: Can I do this strategy AFK?
A: No. Virtual Realm requires manual card selection, manual activation of Enhanced Armament, and potentially manual unit repositioning.
Q: Is Etherealization Level 6 Kirito required?
A: No, it is not required, especially for 100% difficulty runs. It is a quality-of-life upgrade that speeds up clears significantly.
Q: Why must I choose the Death pathway?
A: It prevents Kirito from dying to AoE pools, gives a large Critical Damage buff, and turns harmful Death cards into helpful ones.
Q: What if I don’t get good card choices?
A: Restart the run. A run with bad cards (like flat damage reduction) will likely fail. Consistency comes from resetting for favorable card RNG.
Q: Can I use other DPS units instead of Kirito?
A: While possible, Kirito’s passive scaling with criticals and follow-up attacks is uniquely suited for the high-health pools and scaling in Virtual Realm, making him the most reliable and minimal solo option.
Conclusion
Solo farming the Virtual Realm in Universal Tower Defense is a consistent and rewarding strategy centered on a critical-focused Kirito build. By utilizing the mandatory Death pathway, prioritizing critical damage cards, strategically placing and upgrading your units, and farming at the optimal 100% difficulty, you can reliably earn Virtual Tokens and cards without relying on a team. Remember, success hinges on active play, smart card choices, and adapting your Kirito’s position to handle the formidable boss waves.
